Silo's Hidden "Make a Cool Model" button
by Marcus Lee
If you have ever talked with other artists about 3d modelling programs, you have probably heard people joke that they want a "Make a Cool Model" button. People laugh and that's it. Well, SILO has this button.
I can already hear you scoff- "Where is it?" My answer to
that, is: We're going to make it. In this tutorial, I will show you
how to make a custom button in SILO.
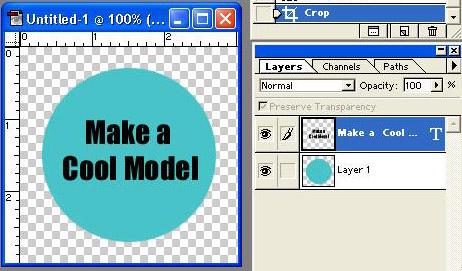
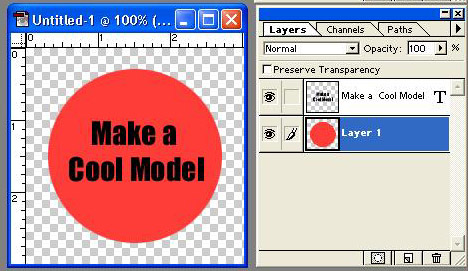
First, we will make the button in Photoshop. Make a new document, with a transparent background. I will be showing you how to make a round button. (note: if you make a box shaped button, you do not need to do any of the steps that involve the alpha channel).
In the first layer, make a filled in circle, then make a text layer that says "Make a Cool Model".
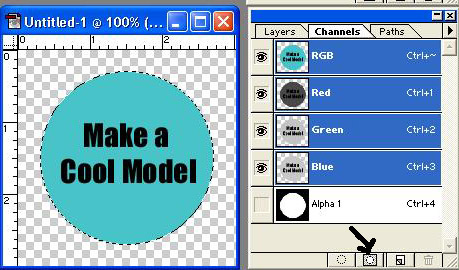
Now, notice that our button is a circle, but the image is a box. We have to make an alpha map to preserve the transparency. An alpha map will tell SILO which parts of your image you want to be visible and which to be transparent- anything white is visible and anything black is transparent.
To make an alpha map for our button, first select the button. Then,
go to channels, hold shift down and click on button (second from the
left) at the bottom of the channels window (I drew an arrow pointing
to it). You should see a new channel appear that says "Alpha 1"
and it shows out button as a white circle that is surrounded by black.
In SILO, go to Options > Button Settings. Now, we get to define the function our button will have. So, what cool model will our button make? I like boxes, so I'm going to use the cube function. In "Button to Insert," select "Cube" and hit "Insert". You should see SILO's default button for the cube function display.
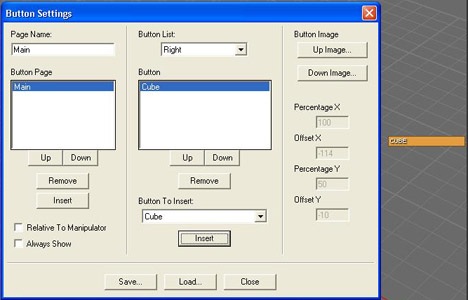
While this button is pretty neat, I want to change the default
button with our baby blue button. To do this, select "Up
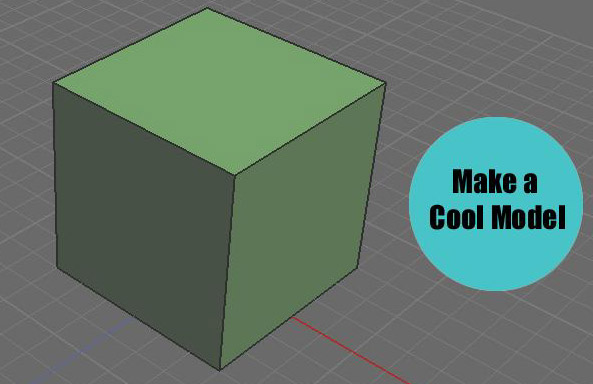
Image," which is on the right. Voila, your beautiful button should
appear. And if you exit the Button Settings window, and click on the
button, a cube should appear- all ready to be shaped into your cool
model.
Another thing that is cool thing you can do, is assign a down
image. If you assign a down image to something that can be
turned on or off, such as area select or walkthrough mode, then when
the function is on, the button will display the down state and when
the function is off, the button will display the on state.
If you assign a down image to something that just works once, like the cube function, then the button shows the down state when clicked on and the up state when it is not clicked on. Let's make a down state for our button.
Open the .psd button image we made earlier and change it in some way. I made the button red. That is what the button down state will look like. Save it as a .png as before.
In SILO, open the button settings window again, click on "Down Image" and select your button down image. Now, when you click on the button, it should change to your button down state!

That's all for this tutorial. I hope that you've found it pretty interesting and will incorporate your own button images into your customs setups. If you want to share your interfaces or see what other people have done, check out the forum here.
See ya!